Table of contents
Imports and includes Copy link to clipboard
Importing a C header Copy link to clipboard
itemis CREATE gives you direct access to C header files within the statechart model. This saves time during development, especially while integrating your state machine with your C program. In general you can import (include) all C header files residing in the same project as well as those header files that are available on one of the CDT project’s include paths, see Properties → C/C++ General → Paths and Symbols in the context menu of your C project. Valid file extensions for C/C++ header files: “.h”, “.hh”, “hpp”, “hxx” and “.inc”.
To import a C header file, go to the beginning of your statechart’s definition section, enter
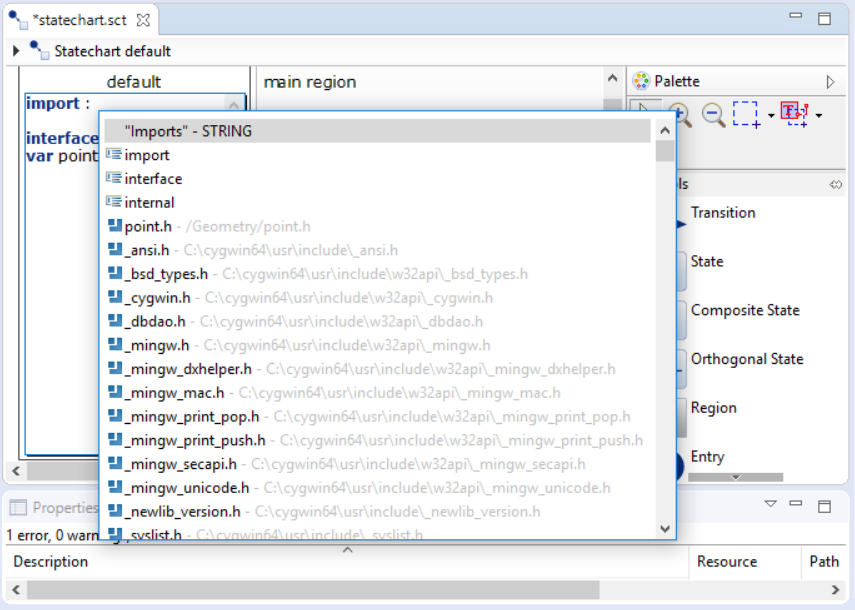
import: and hit [Ctrl]+[Space]. The content assist now shows all C header files you can import (besides other syntactical elements that would be valid here). In our example one of the first includes provided by the content assist is
point.h, which is found in
/Geometry/point.h. Other imports shown by the content assist are provided by the various include paths configured in your CDT project. For example, figure
"Selecting a C header to import" shows headers on the basic
cygwin toolchain on a Windows system.
Please note: Contrary to a C compiler, itemis CREATE do not support transitive imports. That is to say, if a header file a.h imports another header file b.h using the
#includedirective, b.h will not be “seen” in itemis CREATE unless you import it explicitly in your statechart’s definition section.
The following picture for example .

Selecting a C header to import
If we had more than a single header file in the project, we would see them all. The content assist shows all header files in a project, including those in subdirectories. A C header’s path is relative to the statechart it is imported into.
Click on the
point.h entry in the menu to complete the
import statement. The result looks like this:
import: "point.h"

interface:
    var pointA: Point