Table of contents
Creating links Copy link to clipboard
Creating links between artifacts of the trace model is a core functionality of itemis ANALYZE. ANALYZE Editor and ANALYZE Bulk link creation editor support link creation in various cardinalities:
- One-to-one: creating a single link from one particular artifact to one particular other artifact. For example, you can create a link from one specific requirement to the one source code fragment that implements it.
- One-to-many: creating links from one particular artifact to several other artifacts. Consider, for example, to create links from one specific requirement to all source code fragments that are implementing that requirement in concert. Creating links the other way round is also possible, i.e., links from several different artifacts to one particular artifact. As an example, consider a set of multiple requirements that are implemented by a single source code fragment.
- Many-to-many (ANALYZE Editor only): creating links from several artifacts to several other artifacts. Consider, for example, to create links from a set of requirements to a set of implementing source code fragments. In this case, links will be created between each requirement and each source code fragment.
If you will, you might see one-to-one and one-to-many both as special cases of many-to-many. In each case, trace links are created between one or more artifacts on one side and one or more artifacts on the other side.
Please note the following prerequisite: In order to create links between artifacts of type A and artifacts of type B, an appropriate link type for these artifact types must be defined in the itemis ANALYZE configuration. In order to store links of this type, the link type must have a writable data access assigned. For short, we are calling this a writable link type. Please see section "ANALYZE Configuration" for details on how to create link types and on how to assign data accesses to them.
Creating links is done in the ANALYZE Editor or ANALYZE Bulk link creation editor view.
Creating links in ANALYZE Editor Copy link to clipboard
If the ANALYZE Editor view is not yet open, please do the following:
- In the main menu, select Window → Show View → ANALYZE Editor. The ANALYZE Editor view appears.
- In the ANALYZE Editor view, select the Link tab, if needed.
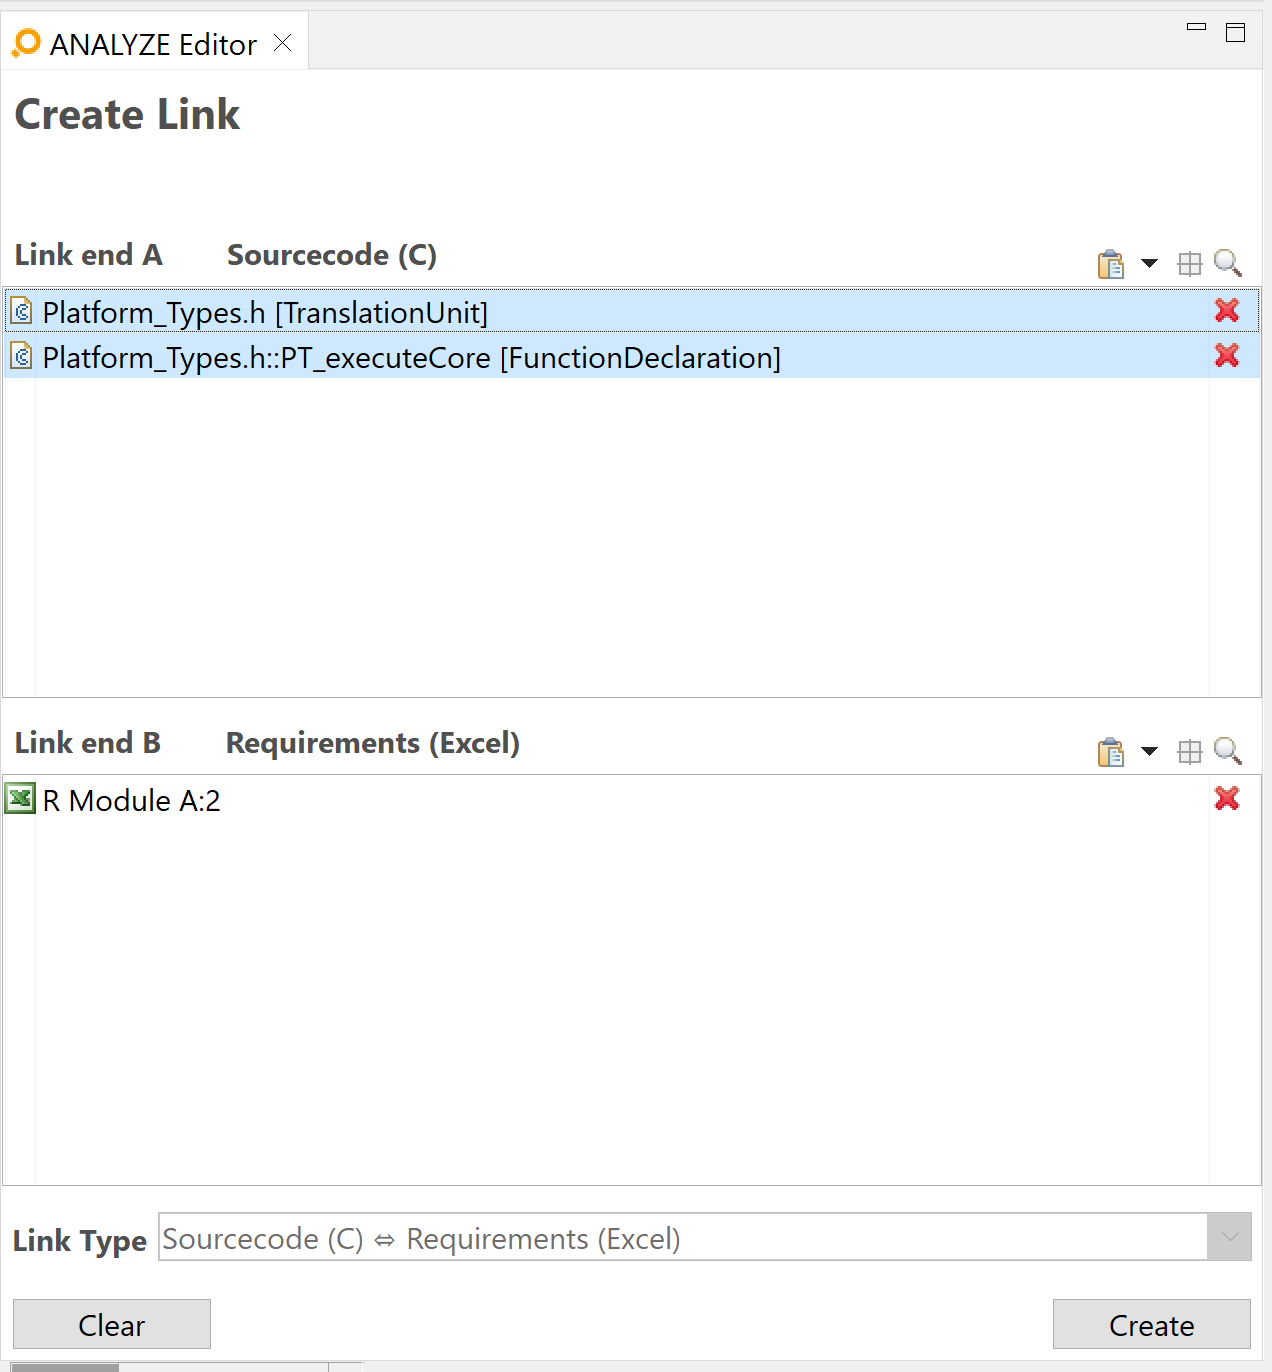
The Link tab’s heading is "Create link", showing that ANALYZE Editor is in create mode – see figure "Creating links".
Creating links
Link creation in a nutshell Copy link to clipboard
To actually create links, perform the following steps:
- Insert one or more artifacts into the Artifact A field. All artifacts are usually of the same artifact type; let’s call it A.
- Insert one or more artifacts into the Artifact B field. All artifacts are usually of the same artifact type; let’s call it B.
- If your ANALYZE configuration contains only a single writable link type for artifact types A and B, ANALYZE Editor detects that situation and displays the link type in the Link type field. However, if you have several matching link types, you have to select the appropriate one from the Link type drop-down menu. – In the example shown in figure "Creating links", the link type describes links between artifact types Software architecture and Software integration test specification.
- Click on the Create button. As a result, ANALYZE creates the trace links. It stores these links in the writable data access that is associated with the selected link type. (If you have associated more than one writable data access with the very same link type, the link is stored redundantly.)
If the Artifact A and Artifact B fields each contain only a single artifact, i.e., the one-to-one case, ANALYZE creates a single trace link between these two artifacts.
If the Artifact A field contains a single artifact and the Artifact B field contains two or more artifacts, i.e., the one-to-many case, ANALYZE creates multiple trace links. For the artifact in Artifact A and each of the artifacts in Artifact B, a link is established. The roles of the Artifact A and Artifact B fields can be swapped, i.e., if Artifact A contains many artifacts and Artifact B contains only one, ANALYZE behaves analogously.
If the Artifact A and Artifact B fields each contain two or more artifacts, i.e., the many-to-many case, ANALYZE creates multiple trace links. For each combination of artifacts in Artifact A and Artifact B, a link is established (Cartesian product). This means that if Artifact A contains m artifacts and Artifact B contains n artifacts, m · n trace links are created. To avoid accidental creation of a large number of links, a warning will be shown if both Artifact A and Artifact B areas contain more than a single link.
In the example shown in figure "Creating links", ANALYZE creates two links:
- from Washer [Component] to SW-ITS: Auto Wiping Evaluator Component: T101.2: turn off, and
- from Nozzle Heater [Component] to SW-ITS: Auto Wiping Evaluator Component: T101.2: turn off.
We haven’t covered yet how you can insert artifacts into the Artifact A and Artifact B fields. Actually, you have a quite a number of different options to do so. They are described in section "Populating artifact areas".
Note that there is a limit for the number of artifacts that can be placed in the Artifact A and Artifact B fields. This is because ANALYZE checks for all artifacts that are selected in ANALYZE if they are compatible to those artifacts already added to the ANALYZE Editor. For large numbers of artifacts, this can freeze the UI. You can adjust the allowed number of artifacts in the preferences.
Creating links across different link types Copy link to clipboard
Usually, all artifacts within the Artifact A or Artifact B area must be of the same type. However, you can remove this constraint:
- In the main menu, select Window → Preferences.
- Open itemis ANALYZE → Layout and Views.
- Check the "Allow link creation for multiple link types at once" option.
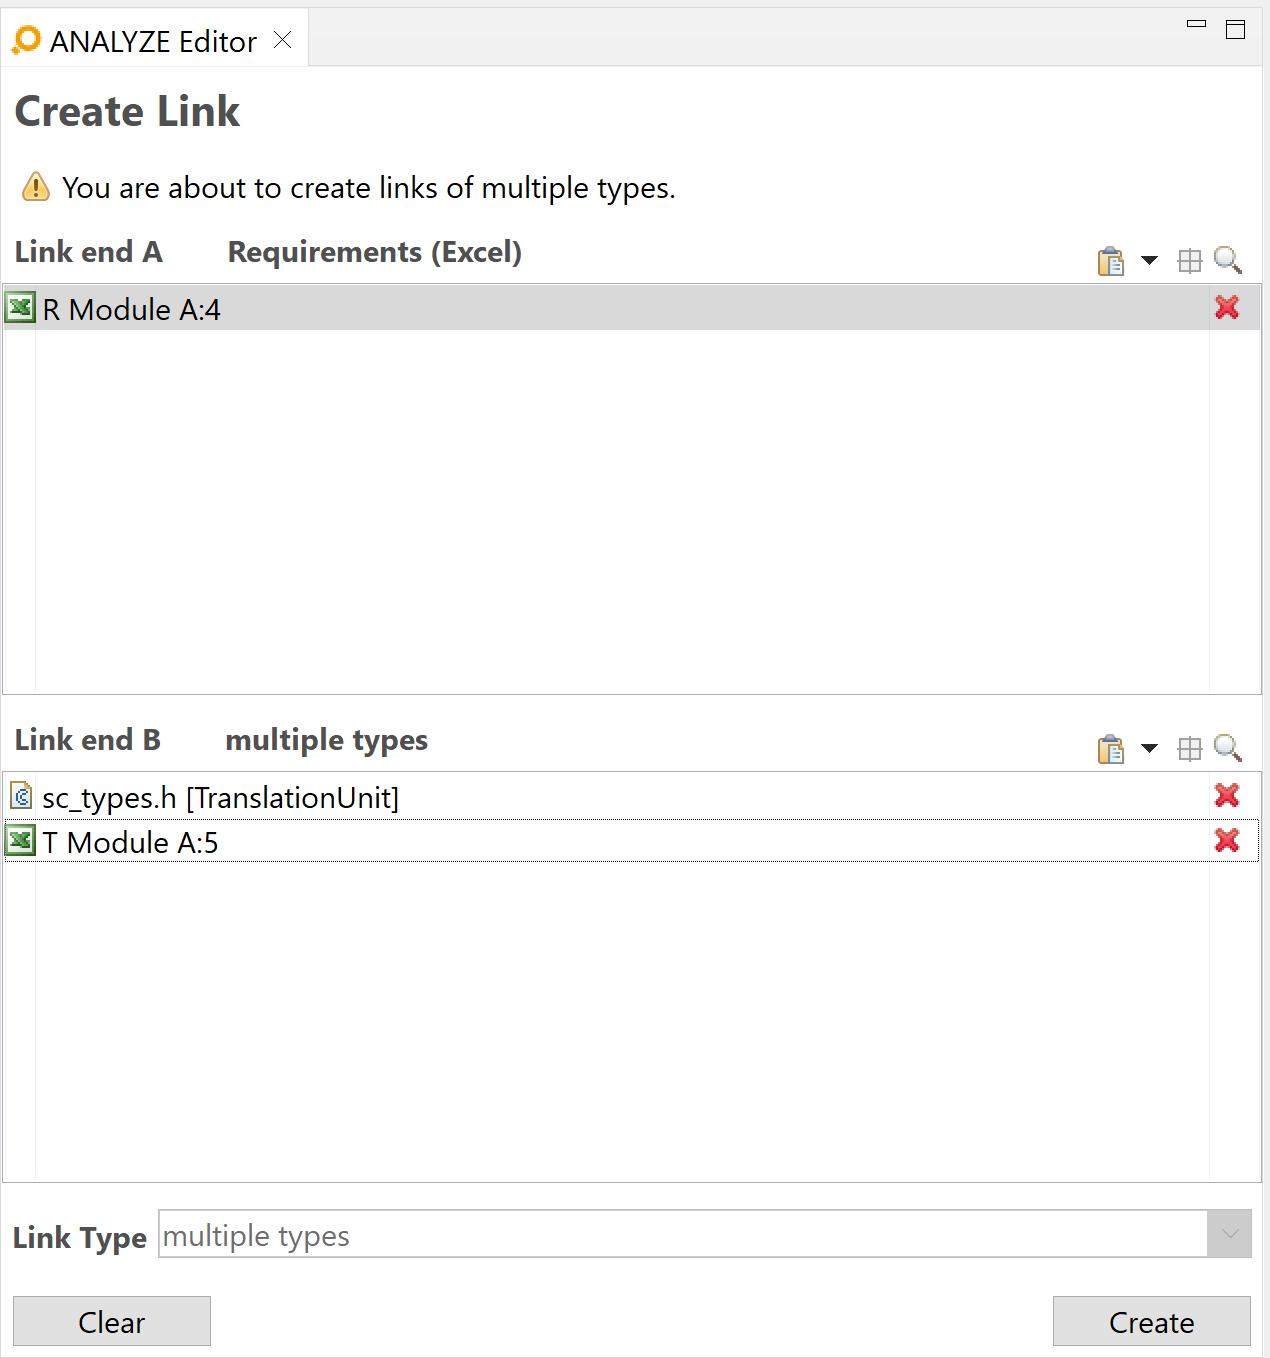
Please note: To have this work, there must be exactly one writable link type for all combinations of artifacts in the A and B artifact areas. For example, if for a certain combination of artifact types there are two link types that allow linking them in both directions, exactly one of them must be writable.
Figure "Creating links across different types" shows an example that links both an XML artifact and an Excel artifact to two C source code artifacts.
Creating links across different types
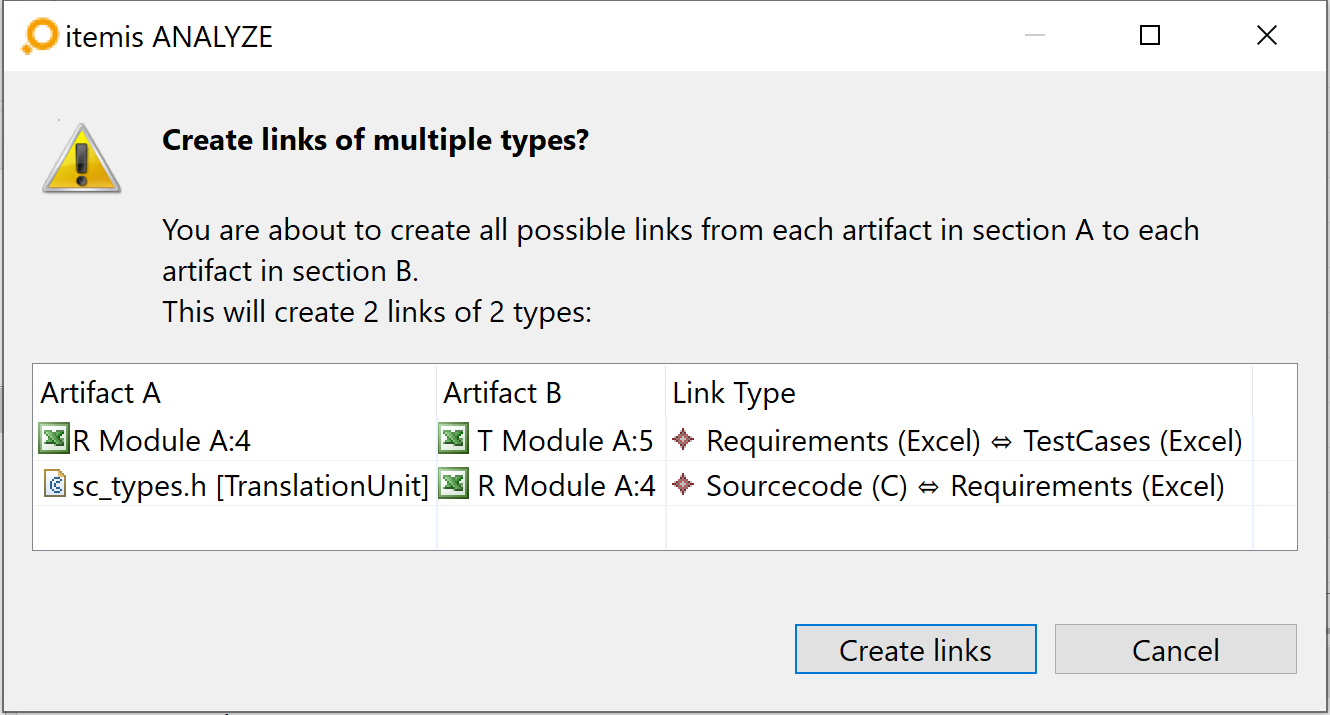
Before actually creating several links across different link types at once, ANALYZE Editor displays a confirmation dialog. This dialog intends to prevent any accidental use of this feature. It provides a detailed list of the links that will be created. It also shows the total number of links to be created and the number of different link types involved, see figure "Link creation confirmation dialog".
Link creation confirmation dialog
After clicking on the Create links button, ANALYZE confirms the successful link creation in ANALYZE Editor, see figure "Successful link creation".
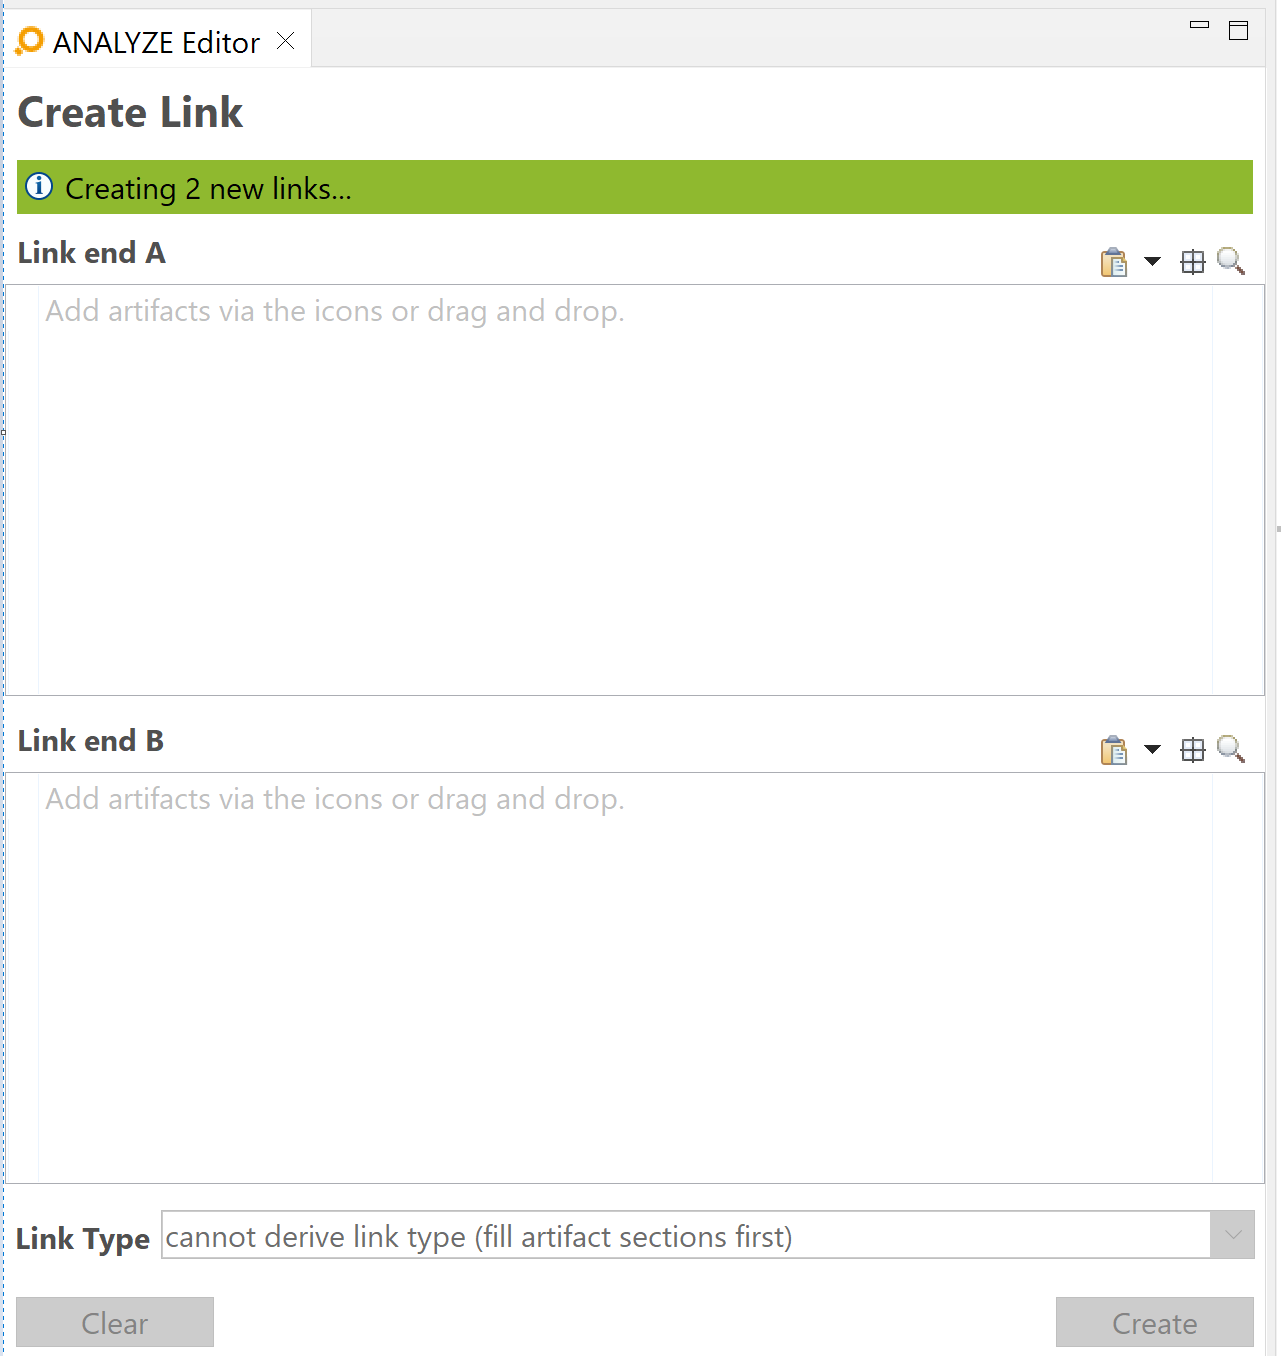
Successful link creation
Creating links in ANALYZE Bulk link creation editor Copy link to clipboard
If the ANALYZE Bulk link creation editor view is not yet open, please do the following:
- In the main menu, select Window → Show View → ANALYZE Bulk link creation editor. The ANALYZE Bulk link creation editor view appears.
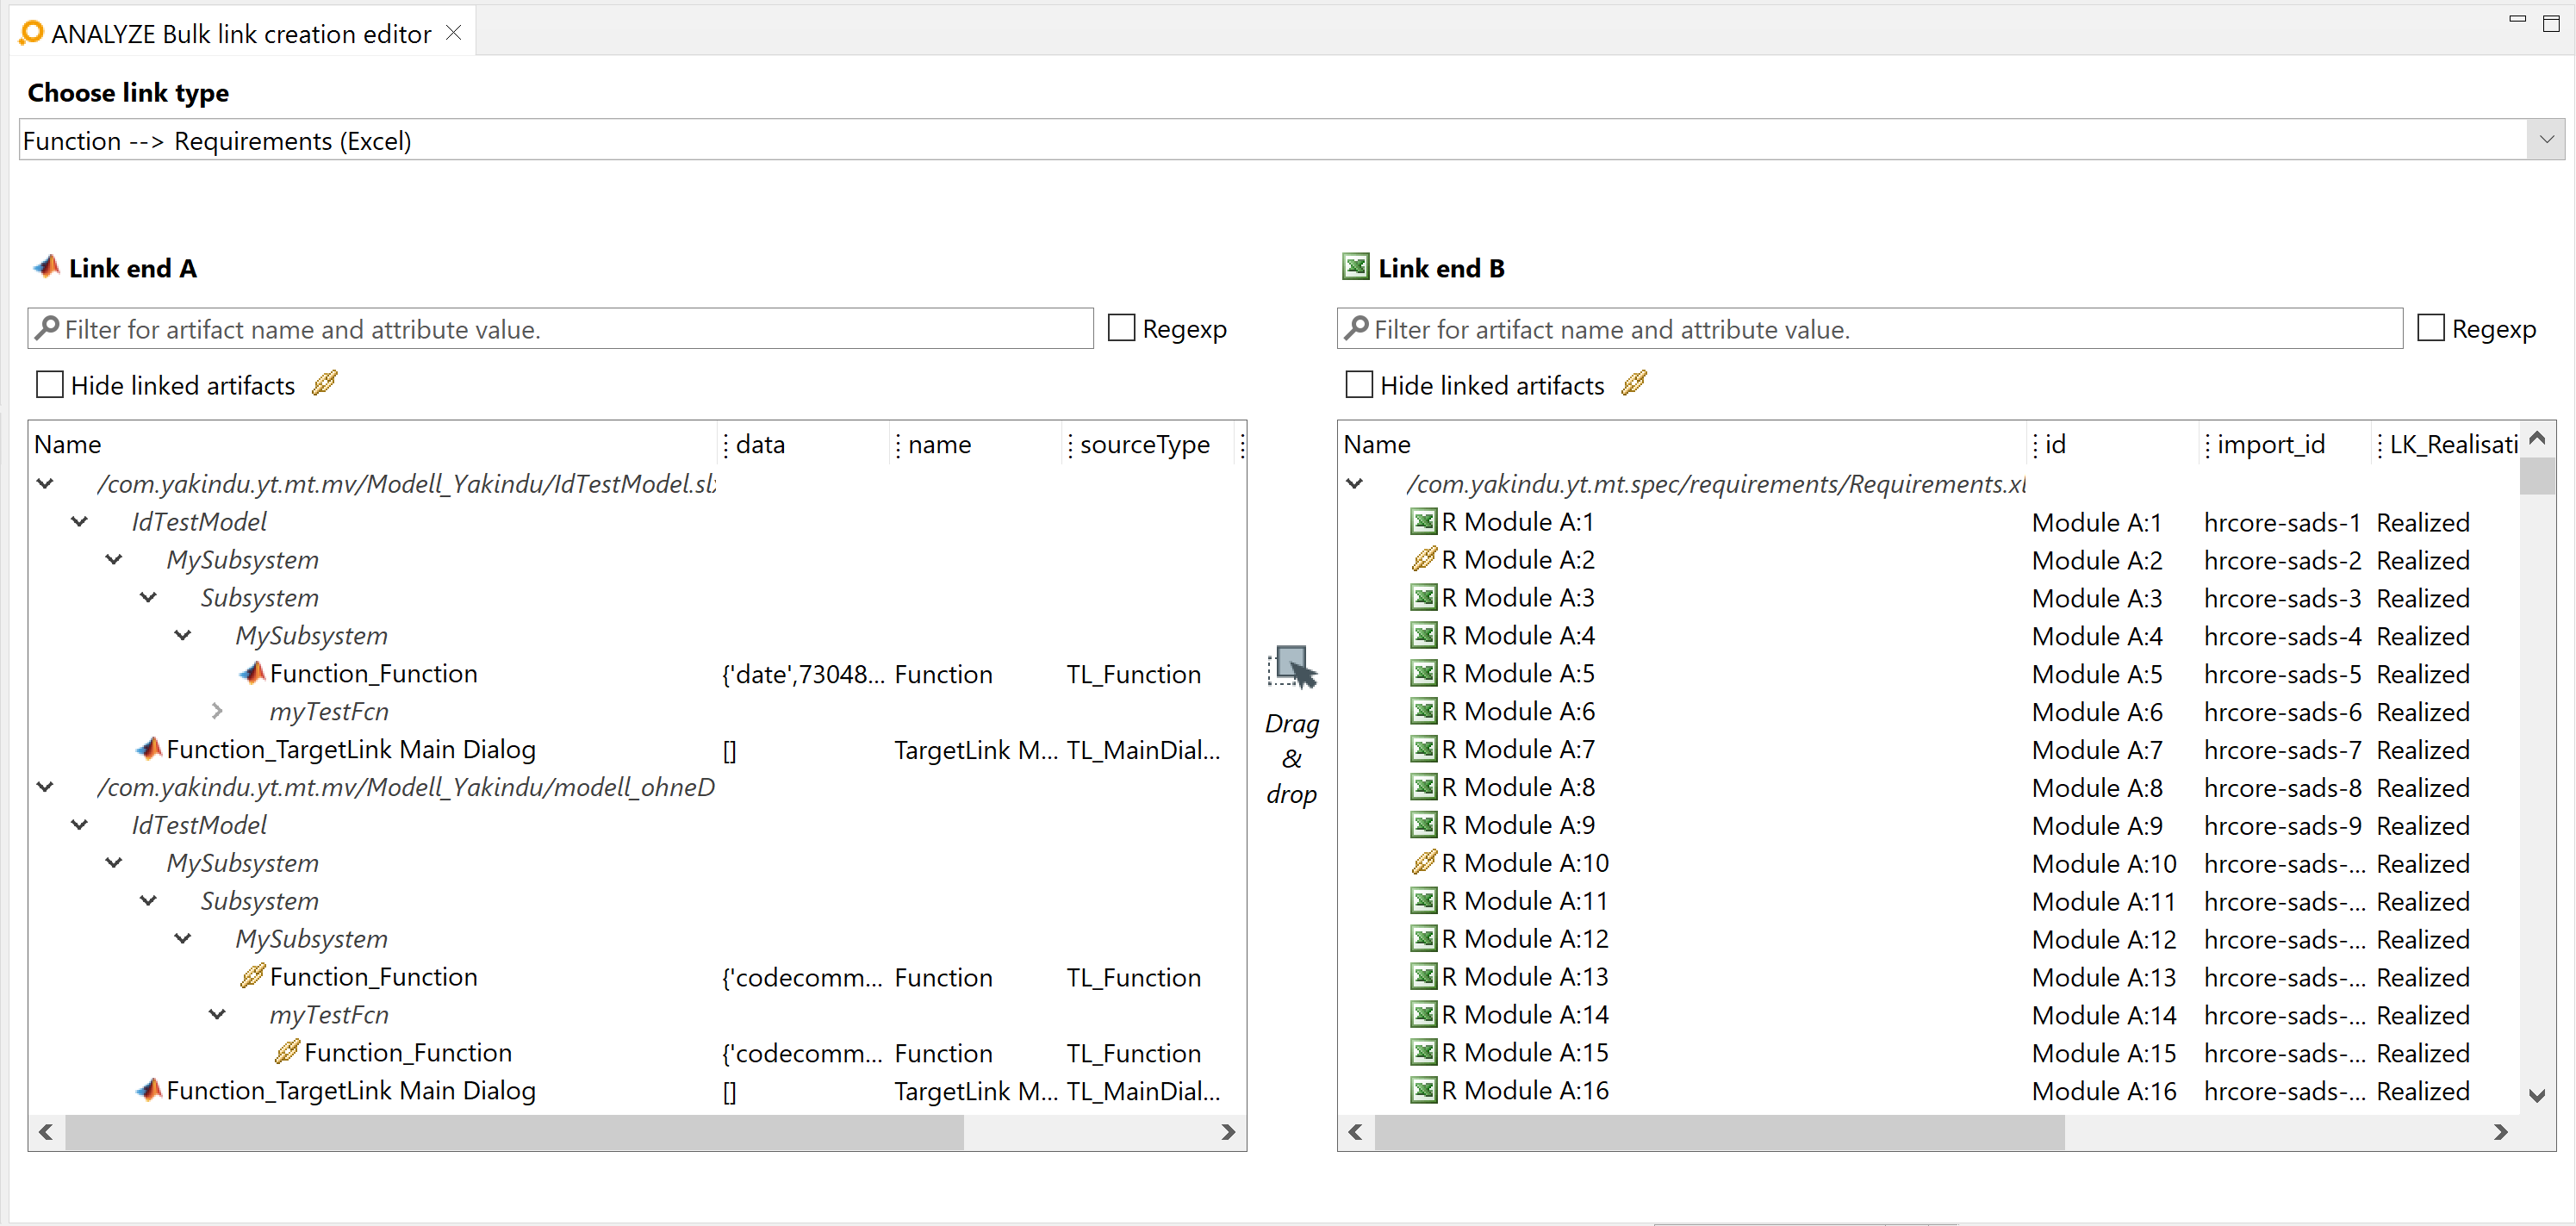
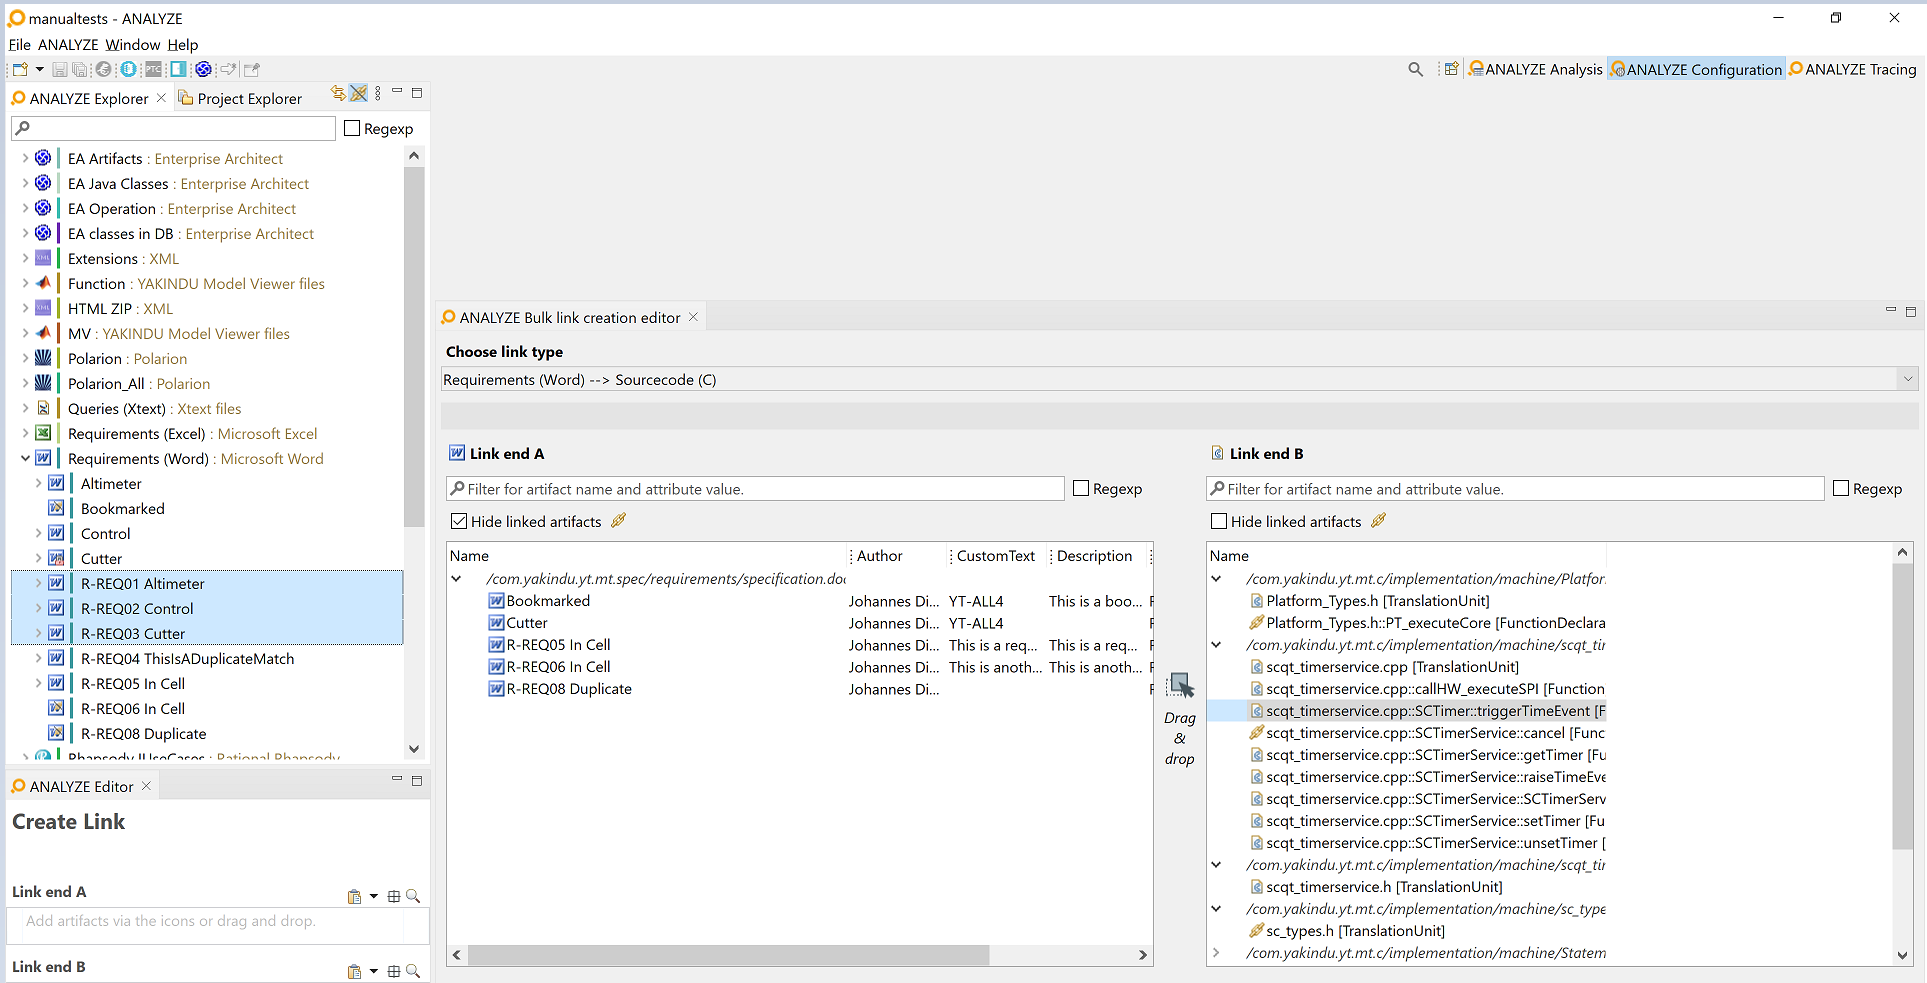
You first have to select the type of the links to be created in the drop-down menu at the top. The bulk link creation editor then shows all possible artifacts of both link ends in the two tree views. That can be quite a lot. To focus on „interesting” artifacts, the hierarchy can be filtered in several ways. Filters can be combined.
- You can request to show unlinked artifacts only.
- You can enter a search text to show only matching artifacts. Regular expressions are supported.
- For each custom attribute column, a pop-up menu allows to set an additional filter for attribute values. To open the pop-up menu, click-right on the column header.
Links are actually created by dragging and dropping artifacts onto other artifacts in one of the hierarchies. You can select one or more artifacts on one side, drag them to the other side, and drop them onto a specific artifact. Alternatively, you can select artifacts in any other view of ANALYZE and drag and drop them to the hierarchy on either the left or right side. The type of the links created is always the one selected in the ANALYZE Bulk link creation editor.
Examples for using the ANALYZE Bulk link creation editor Copy link to clipboard
In the next two examples we will show you first how to use the different types of filters for the bulk link creation editor. After that, we will explain how to create links via drag and drop.
Using filters in the bulk link creation editor Copy link to clipboard
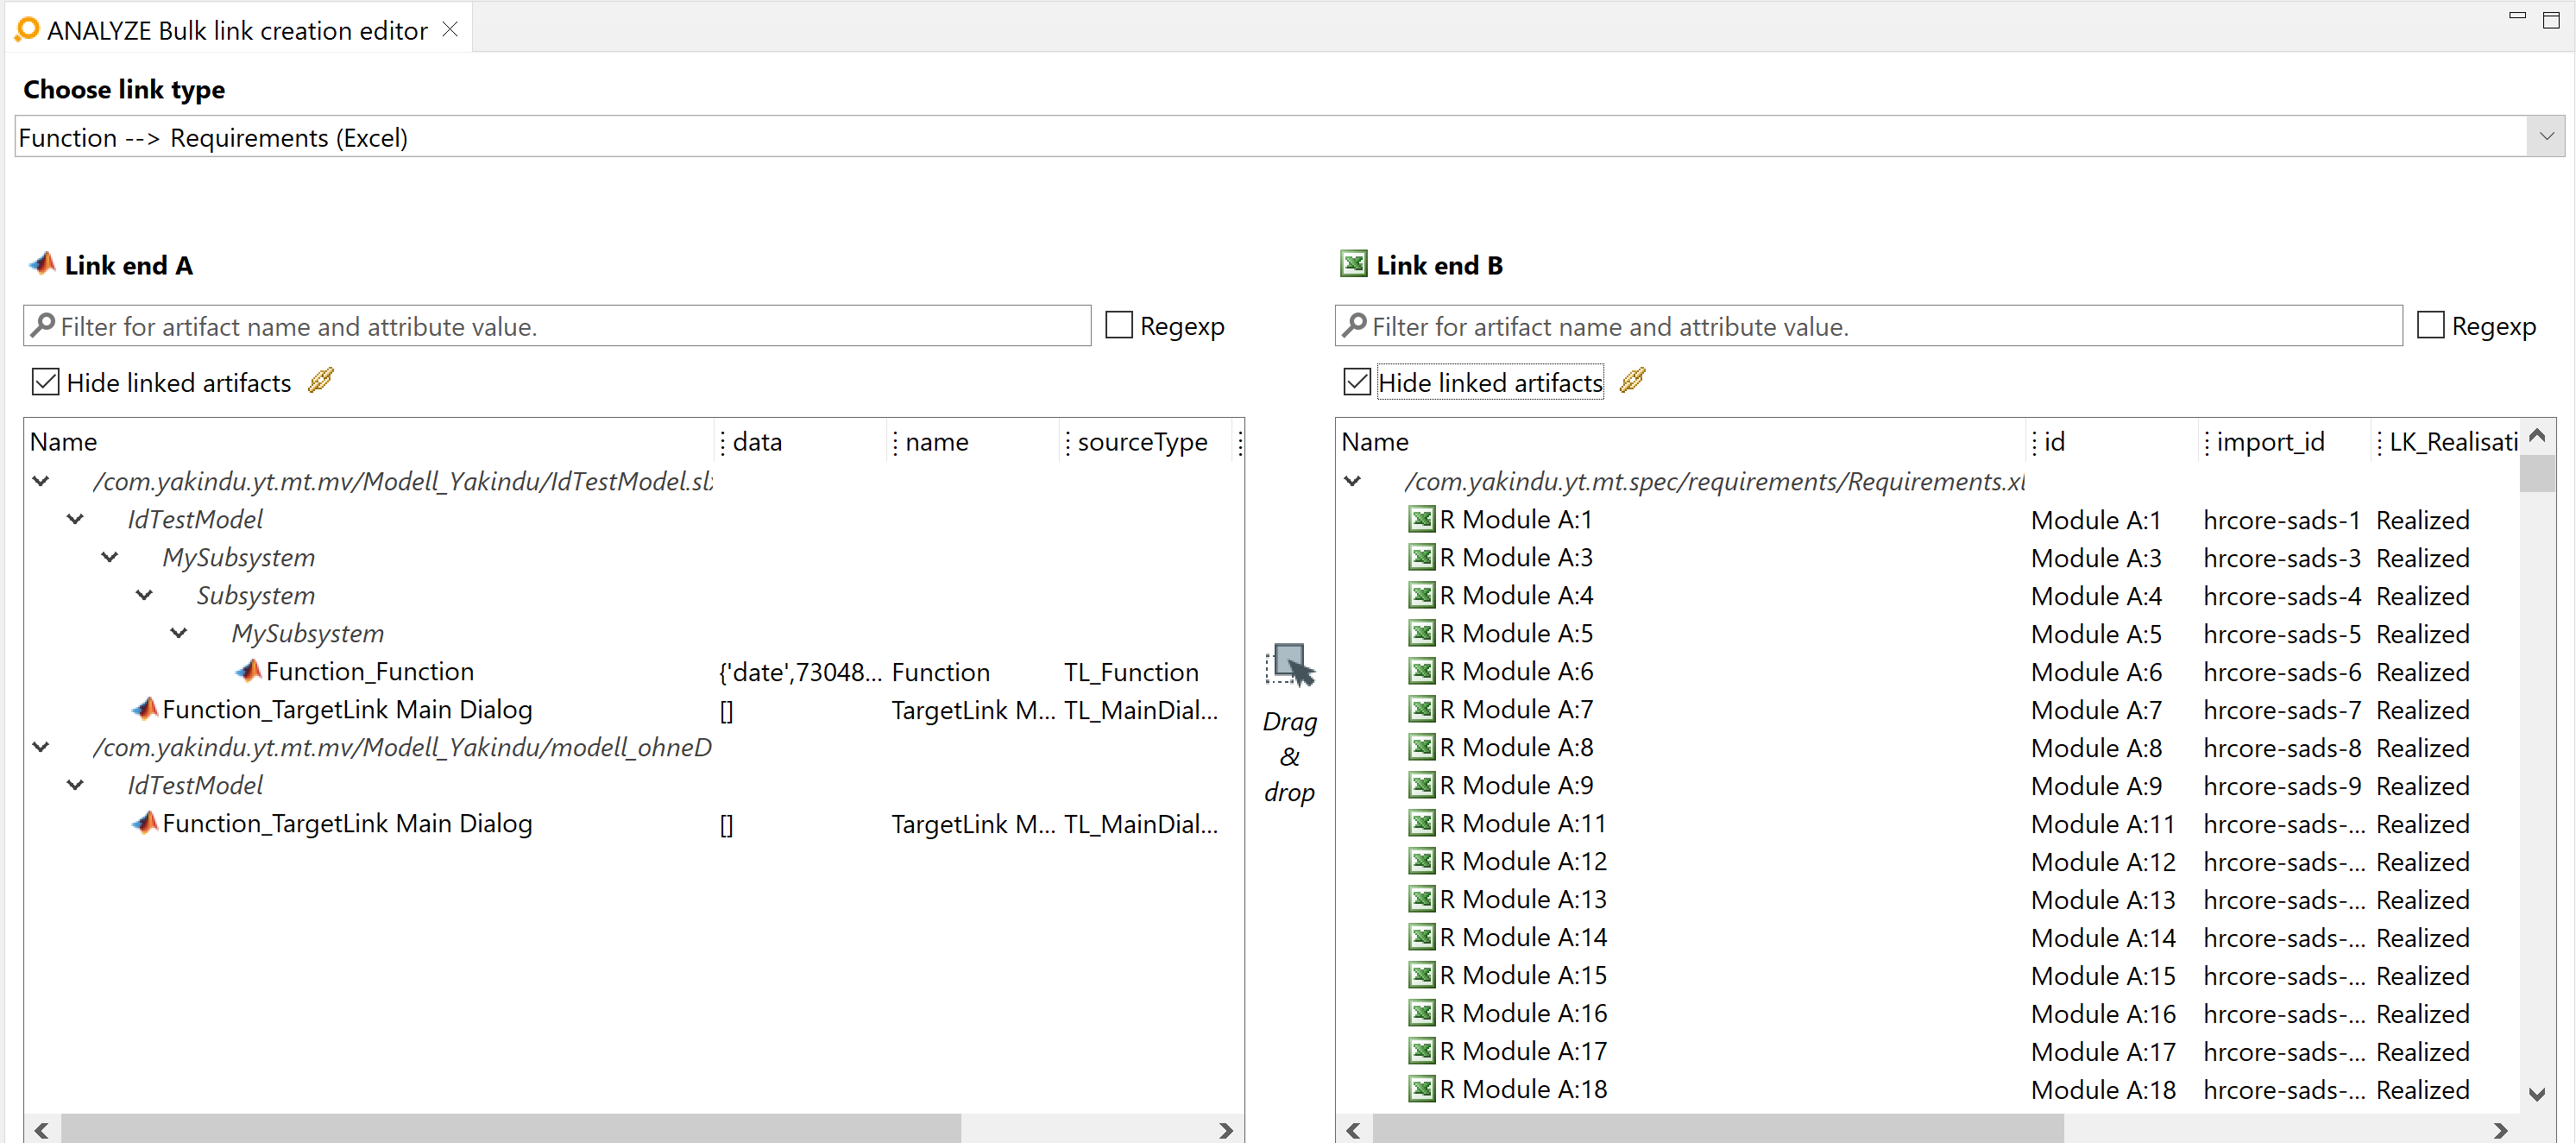
In the figure above, you can see that ANALYZE shows many artifacts, and it can be difficult to find the particular artifacts you want to link. To reduce the size of the lists, we can use different types of filters. Let’s first hide those artifacts which are already linked – provided of course that we want to create links between artifacts that are not yet linked. For this, we enable the checkboxes Hide linked artifacts on both trees. The figure below shows the result:
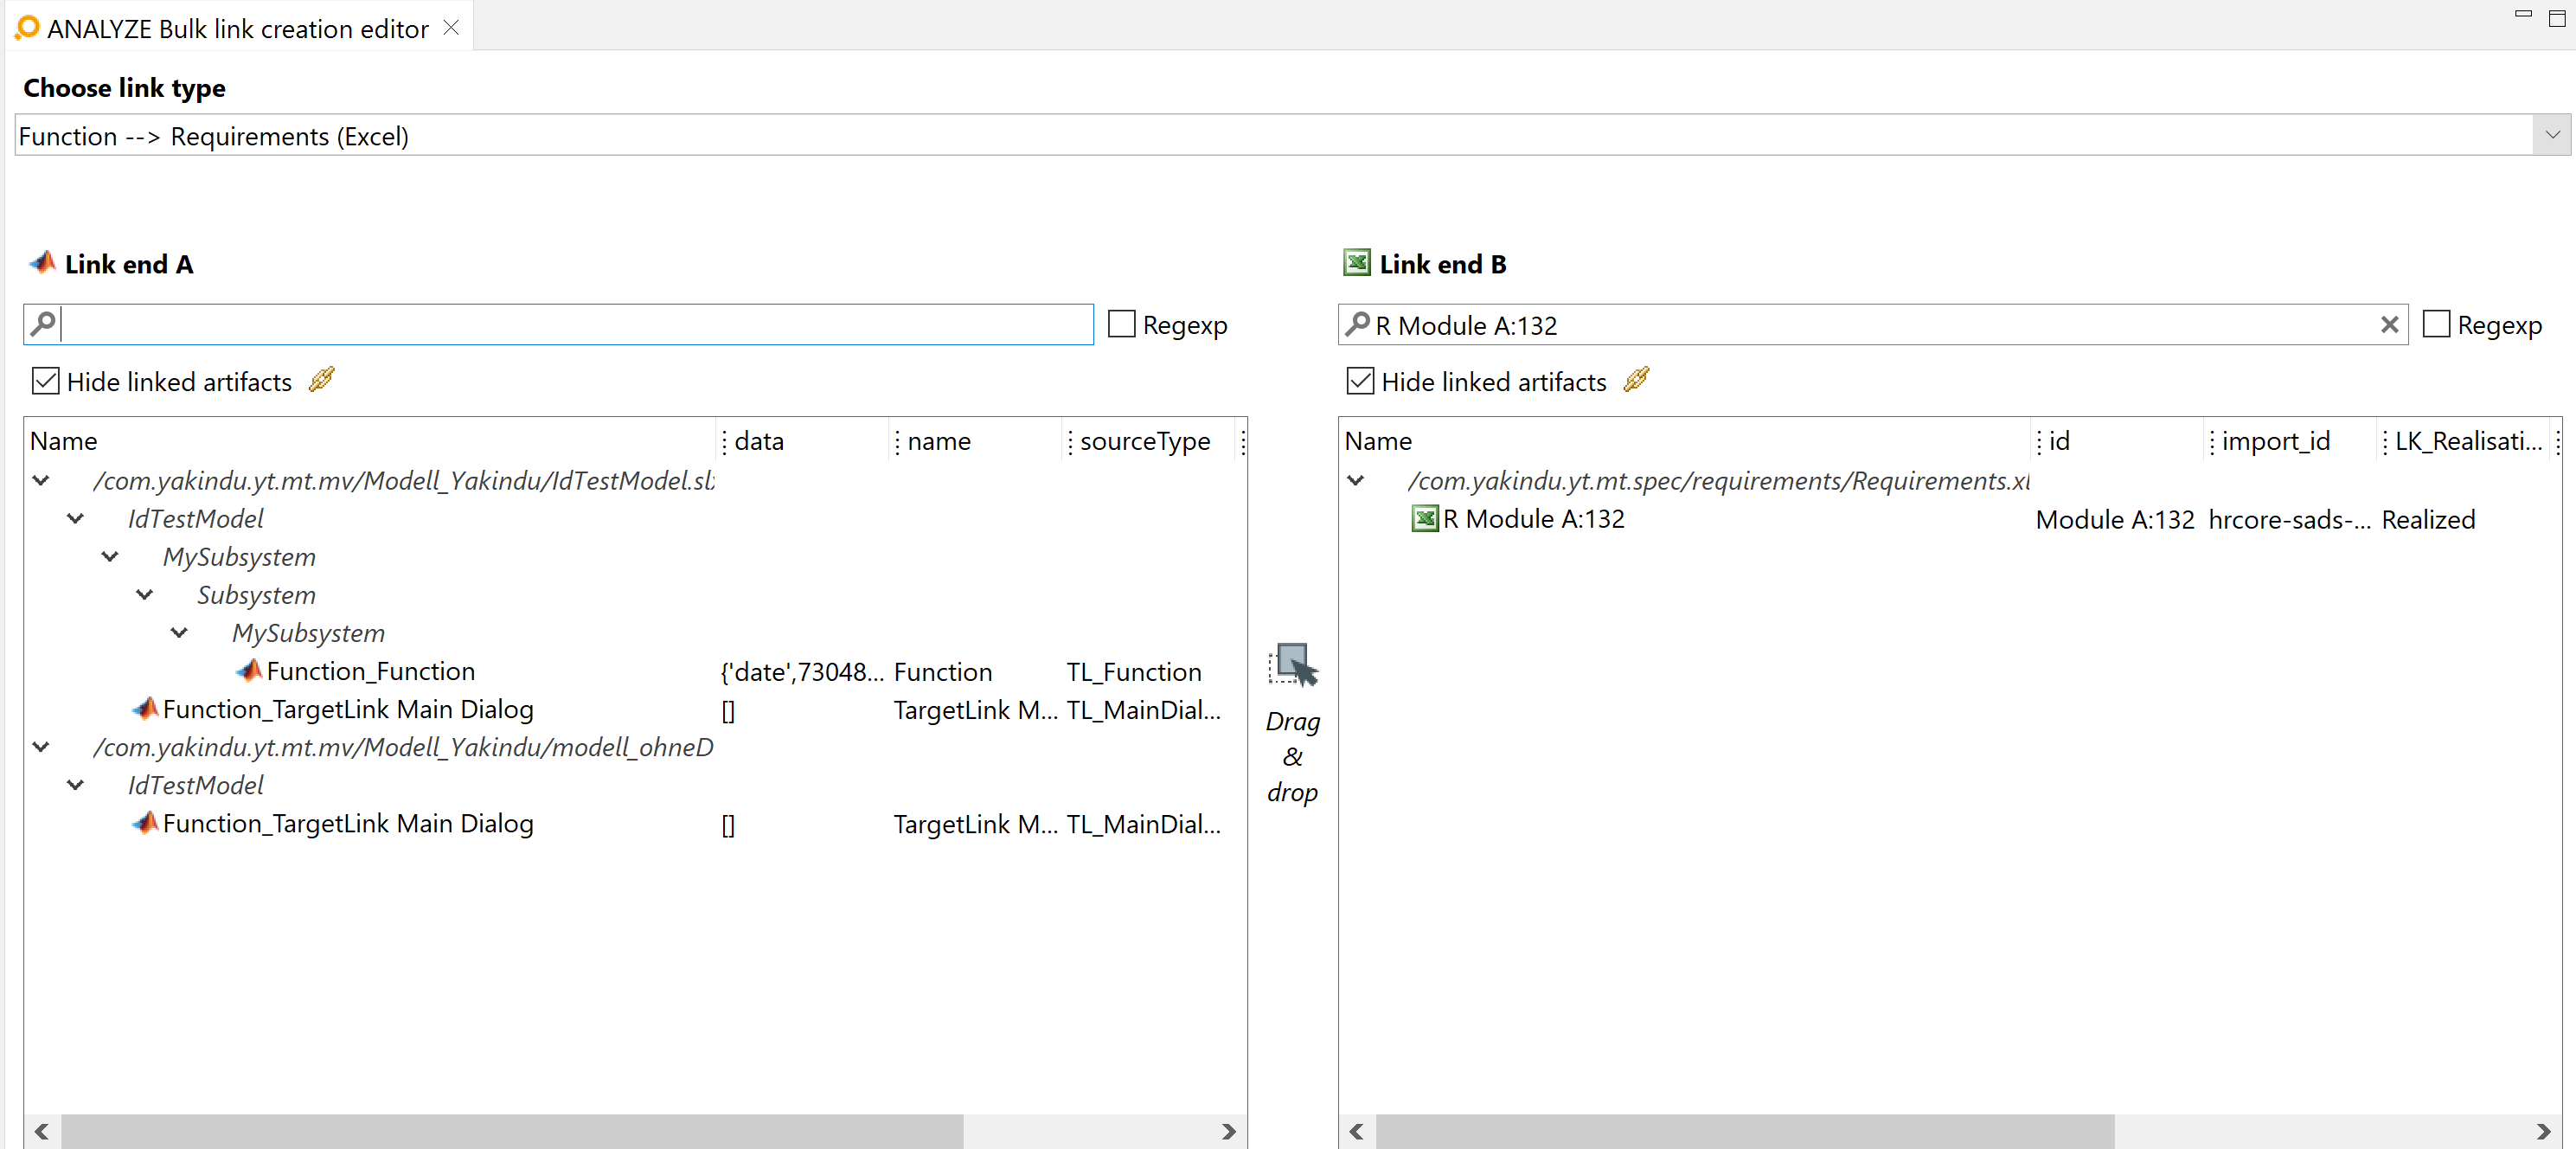
A different approach is to filter artifacts by their names. In our example, the artifact at link end B side we want to link to is called
WiperWasher. So we enter
WiperWasher into the search text field. As result, we will get only those artifacts whose names match the search text. Alternatively, by ticking
Regexp, we could have used a regular expression. For example, a regular expression like
W.*W.* would – in this case – have returned the same result. The figure below shows the filtered artifacts:
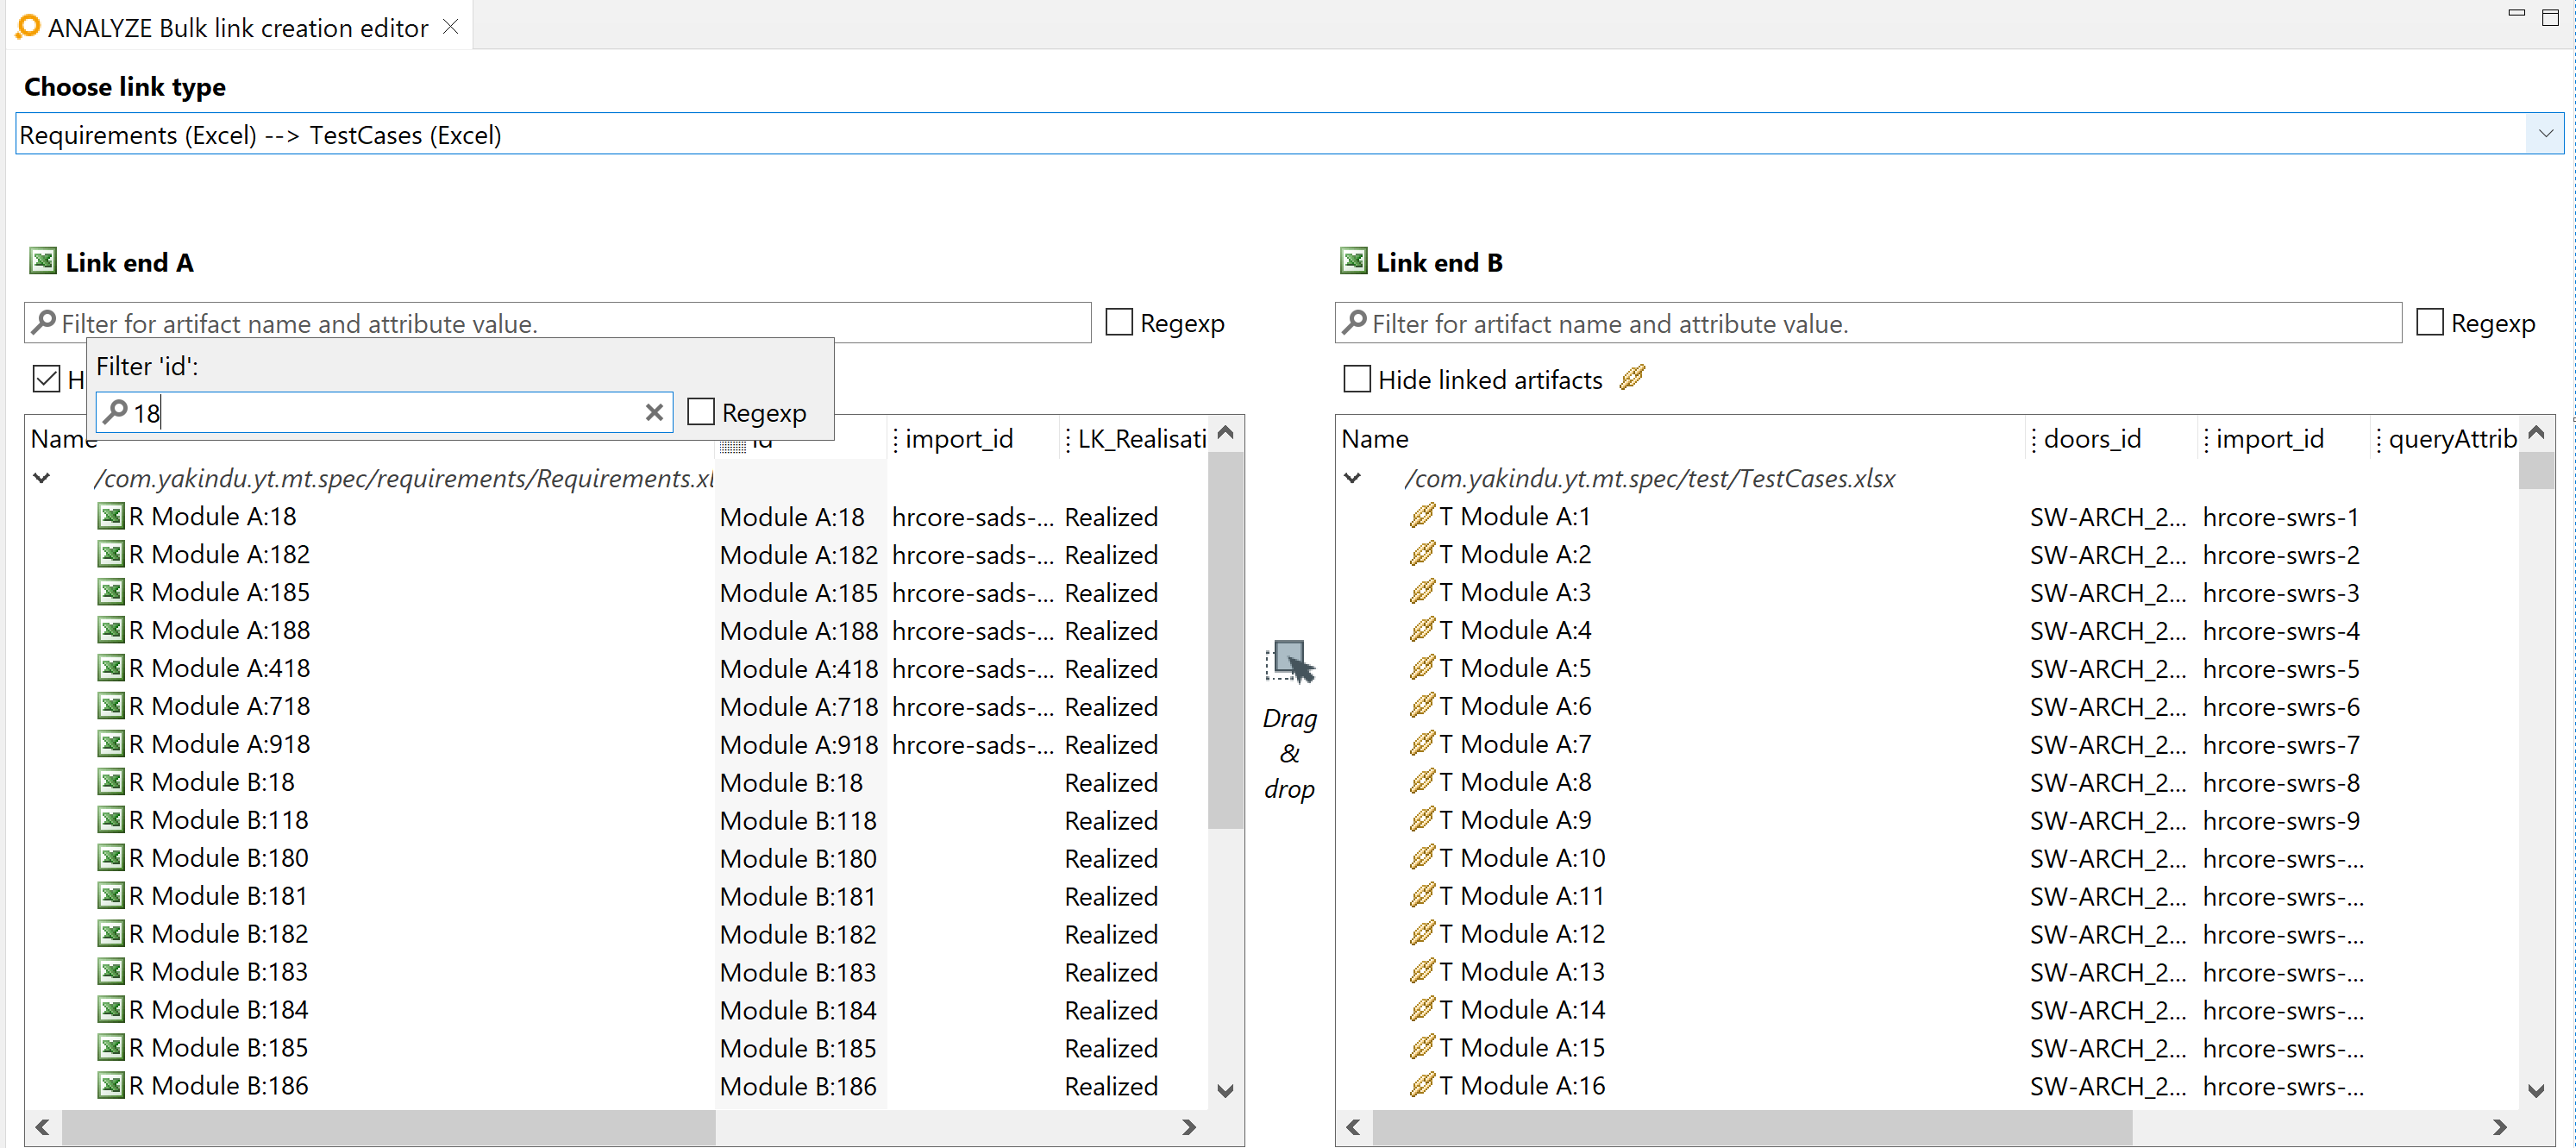
What we can do now is filtering on a custom attribute values, i.e., restrict the result set to those artifacts where the value of a given custom attribute matches a search expression. For achieving this, we right-click on the attribute’s column header. A pop-up menu with a text field will appear, and the search expression has to go into that field. In our case, we will filter on the text custom attribute, and we want to find those artifacts where that attribute contains the text „18”. A column which has a filter set is marked with a filter icon. The figure below shows the custom attribute filtering just described:
Using drag and drop in the bulk link creation editor Copy link to clipboard
The following example will show how to create links by dragging artifacts from the link end A side to the link end B side and dropping them on the artifact to link to.
Here we have disabled the Hide linked artifacts checkboxes, because otherwise the artifacts would immediately disappear from the view after having created the links. The remaining filters are still active. The figures below show how artifacts can be dragged and dropped to create links.
The two artifacts from the left side are selected and dragged to the right side, directly above the artifact you want to link them to.
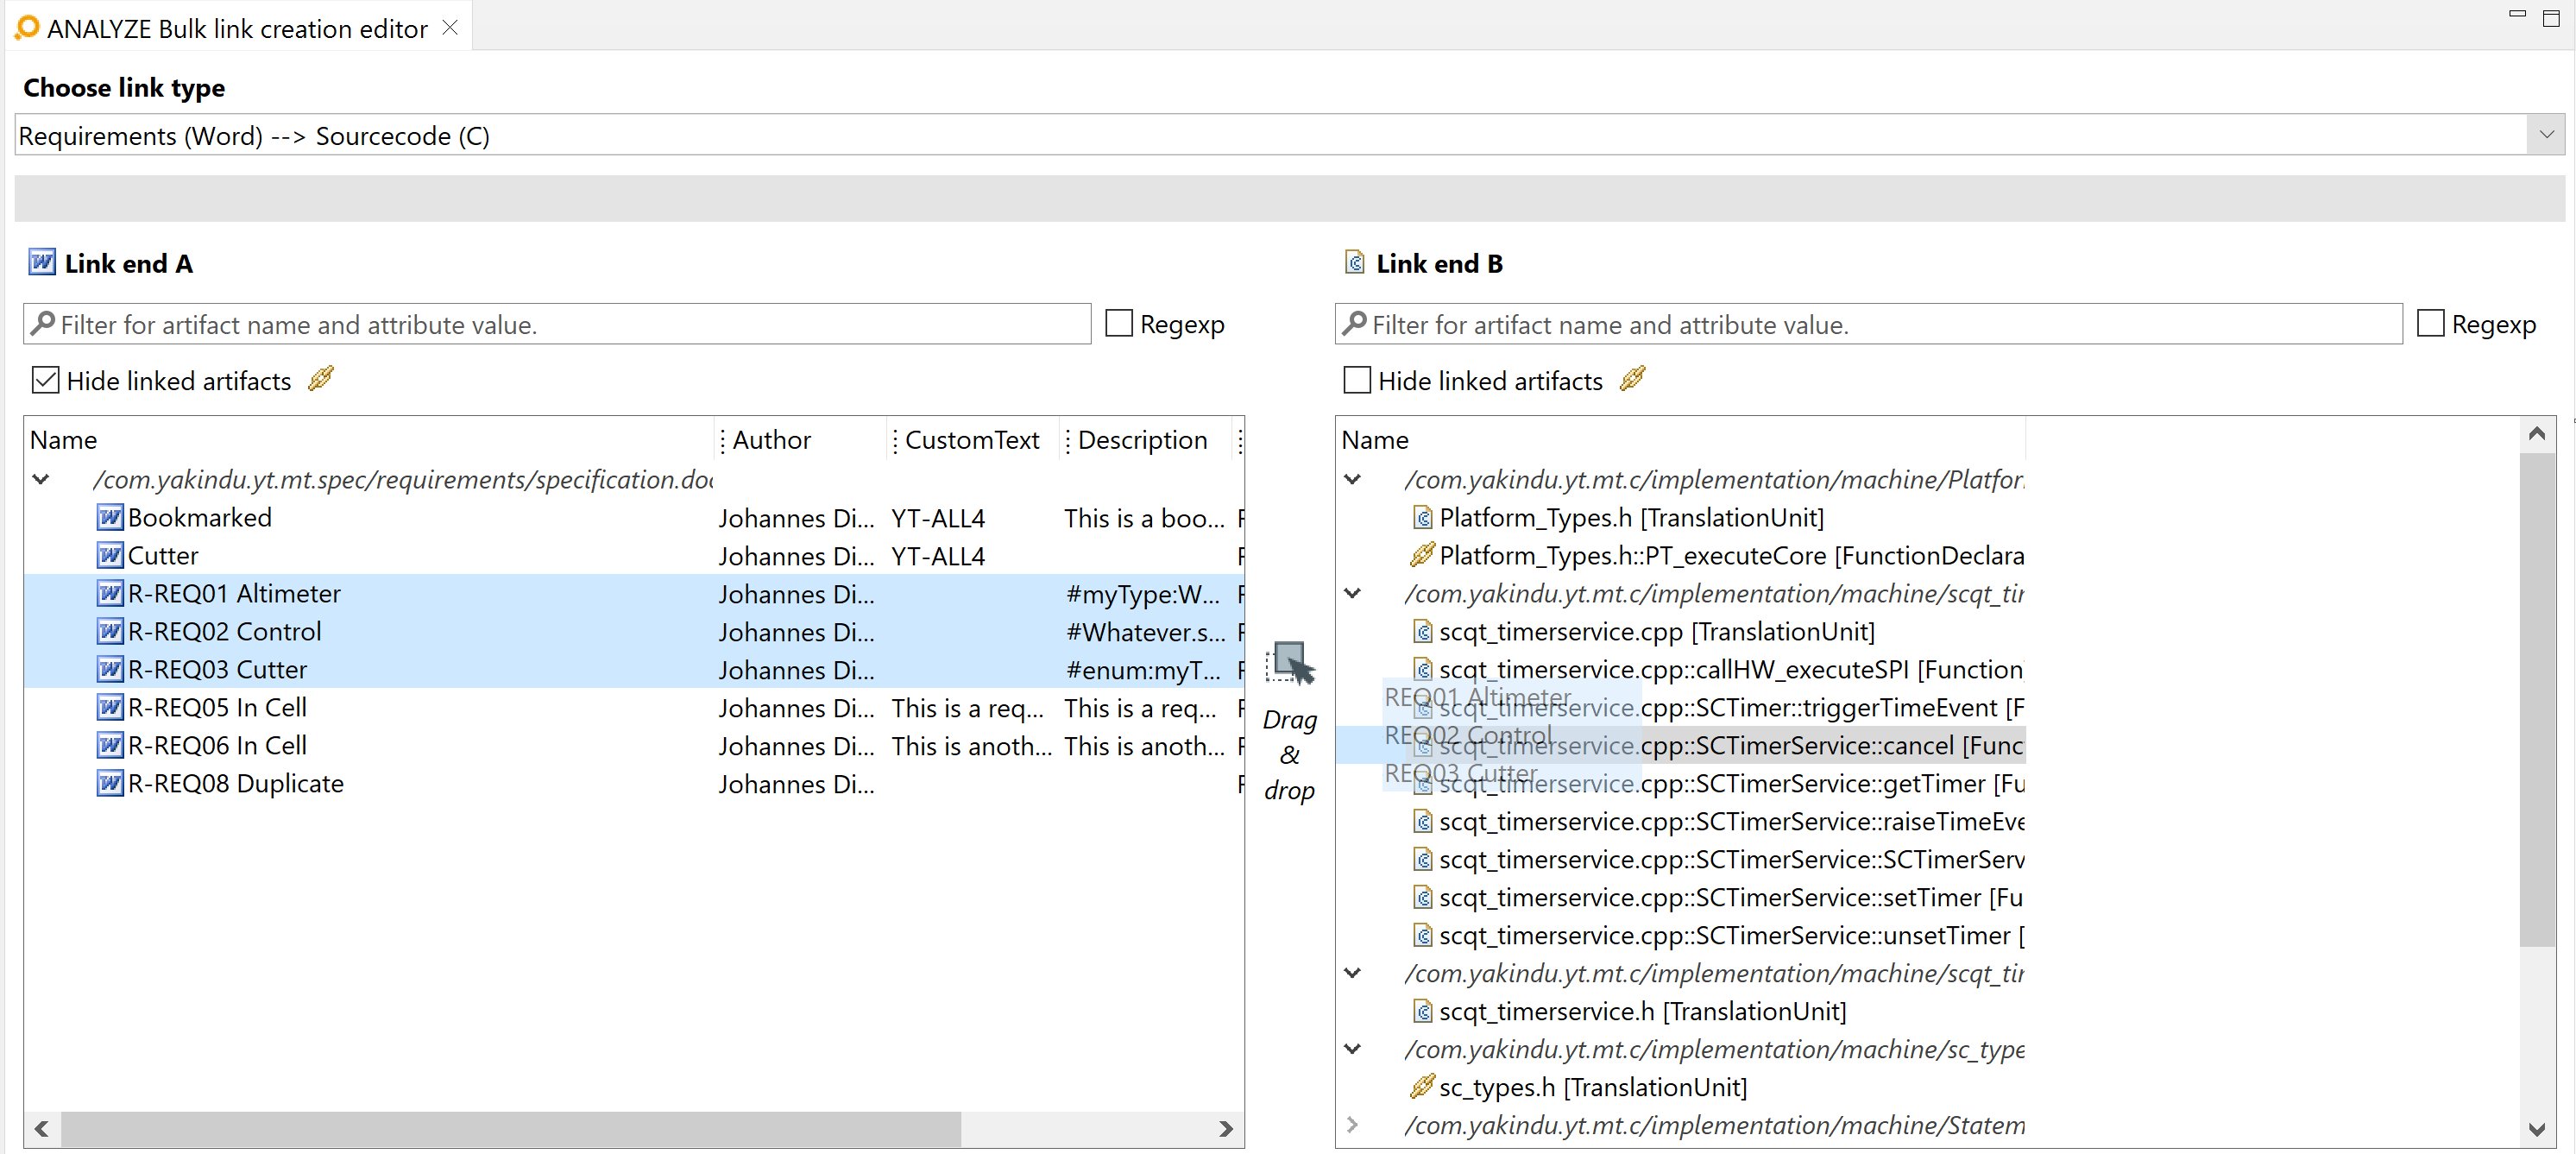
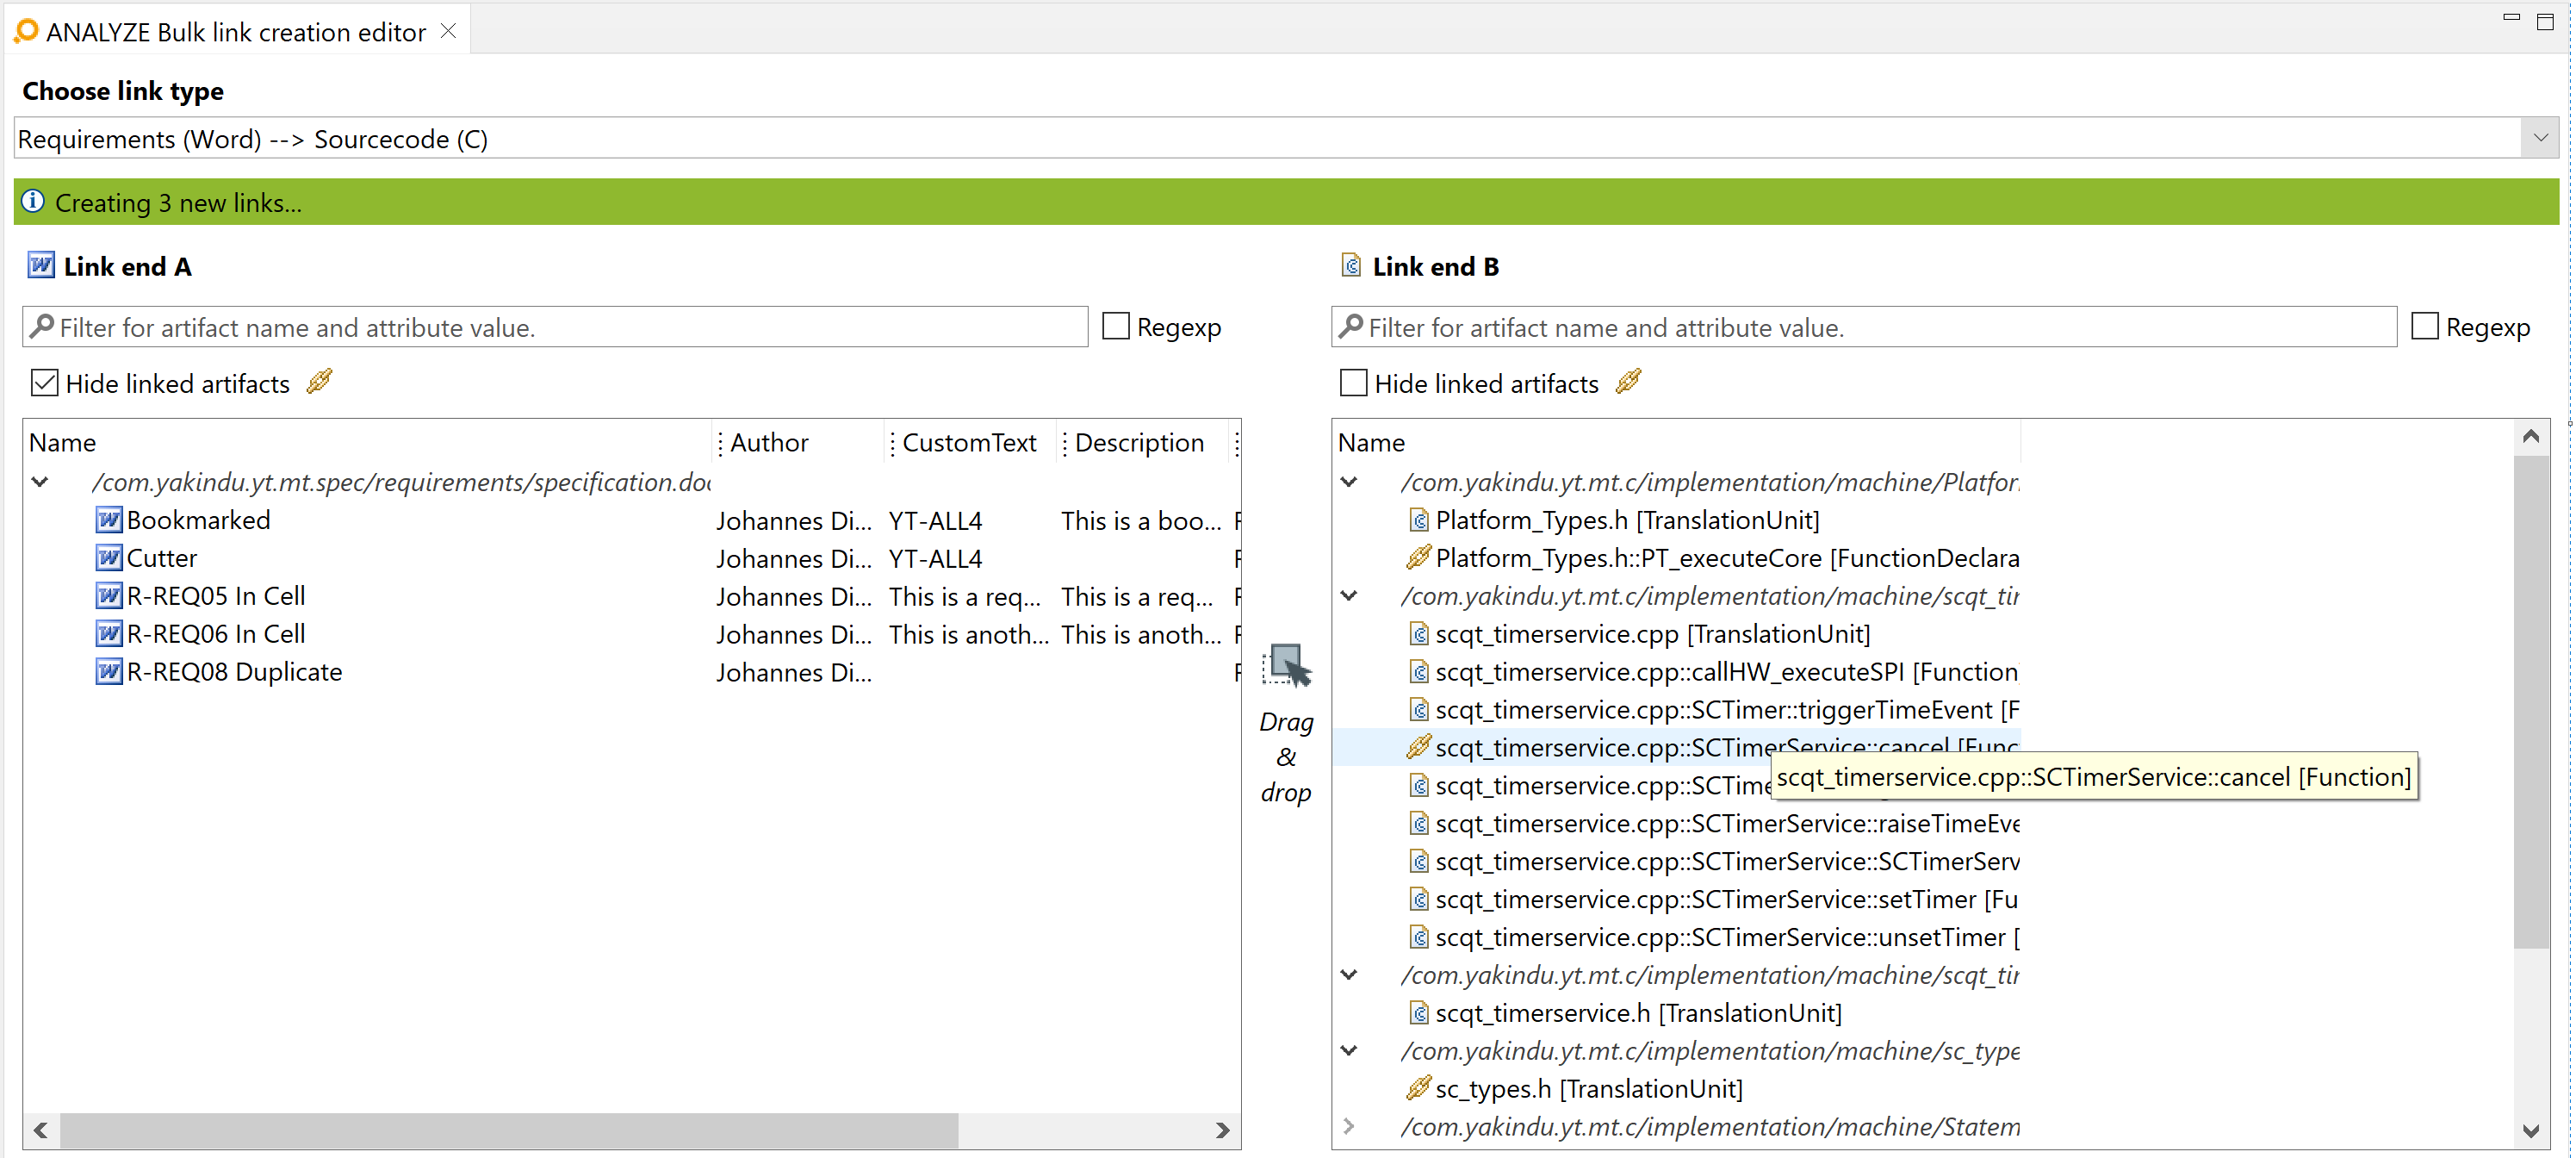
After dropping the two artifacts, two links will be created. A visual clue is the change of each involved artifact’s icon to a chain symbol, denoting a linked artifact. ANALYZE will also tell you how many links have been created, see the image below.
It is also possible to drag artifacts from a different view to the bulk link creation editor and drop them there. In the figure below, four artifacts are dragged from the ANALYZE Explorer. Links to the artifact in the right-hand tree are created once artifacts are dropped onto it.
